VideoCAD

Export 3D view areas to general 3D design software

Hide Navigation Pane

Export 3D view areas to general 3D design software

Previous topic Next topic No directory for this topic Expand/collapse all hidden text  

Export 3D view areas to general 3D design software

Previous topic Next topic Topic directory requires JavaScript JavaScript is required for expanding text JavaScript is required for the print function Mail us feedback on this topic!  


In many enterprises, projects of all building systems are executed in a single software environment of 3D design.

However, despite the enormous number of tools of modern 3D design software, a lot  of CCTV design problems are outside of their opportunities.

For example, creation of image models from cameras with known parameters in certain conditions , modeling camera view areas with the pixel density , lens distortion and shadowing from obstacles etc.


These and other useful in CCTV design  opportunities are available in VideoCAD. Furthermore , VideoCAD has means of import and export , which allows to use VideoCAD as addition to other 2D/3D design software.


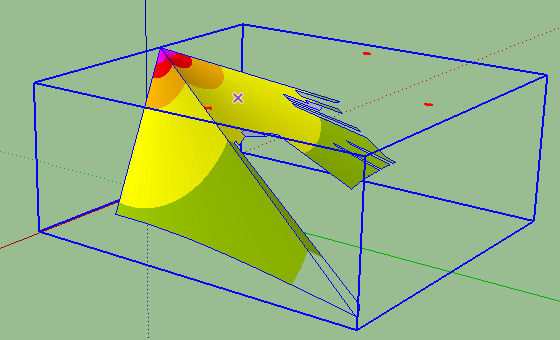
Means of import and export in 2D are described in the Example.  Saving images of individual cameras is easy. Saving monitors is discussed here. In this example we consider import of 3D project from SketchUP and export of 3D models of the view areas to DXF format and import them into SketchUP.


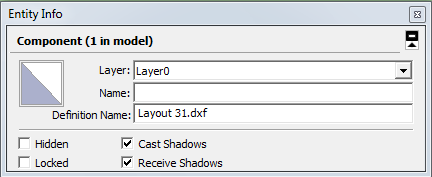
Free version of SketchUP does not support importing DXF format. To import DXF you need SketchUP paid version or you can search an appropriate plugin for importing DXF format for the free version of SketchUP.


Problem


There is a project of a building in 3D. The project must be supplemented by view areas of CCTV cameras, made with visualization of pixel density, taking into account lens distortion and shadowing from obstacles.


Order of work


       1. Import of a project into VideoCAD


The import is performed via SketchUP and special VideoCAD plugin. The SketchUP can open files of the most of 3D formats.

See more: Work with 3D models-territories.


       2. Choosing and placing cameras


Choosing and placing cameras, generation of image models of cameras are performed in the usual way on the special layers with set heights and using projection and sections of the 3D model-territory as a background.

See more: Work with 3D models-territories.


       3. Saving obtained view areas


3.1 When all cameras were placed, open the 3D World.

3.2 Activate all the cameras are displayed alternately with the 3D World opened to calculate all shadows completely.

3.3 Hide the cameras whose view areas are not necessary to export.

3.4 Click on the Save & Print button, in the pop-up menu select Export 3D view areas to DXF and save the *. dxf file.


       4. Import of 3D view areas to the main 3D design software (for example SketchUP)


4.1 Open your project in SketchUP.

4.2 Choose File>Import

4.3 In the appeared dialog click Options

4.4 In the appeared dialog choose unit of measure in imported file according to unit set in VideoCAD (meters or feet) then click OK.

4.5 Choose just saved *.dxf file and click Open.

4.6 Depending on the number of view areas and their complexity, the import may take some time.

4.7 During import, a box with the results of the import will appear. Click Close.

4.8 When the import is ended, you will see the imported view areas in the SketchUP.


4.9 Align the view area with constructions in your project and you will get 3D project with exactly calculated view areas.


       5. How to make view areas semi-transparent in SketchUP


You can make view areas semi-transparent. For this purpose:


5.1 Select view areas, right click then choose Entity info in the pop-up menu.


5.2 In the appeared dialog click on the square in the left-top corner - the Choose Paint dialog will appear.


5.3 Shift the list of materials down and choose a material with color used for view area coloring.


5.4 Click Edit - The Edit Material box will appear.


5.5 Set the transparency of the material using the Opacity slider. Click OK.

5.6 Click OK in the Choose Paint dialog.

5.7 Click again on the square in the Entity info dialog and set the opacity of other colors used in the view areas.


The result can look like this:


See also:Export selection to 3D COLLADA file, Drawing>Save as, Drawing>Import DXF/DWG background, Options box>Export, Work with background in AutoCAD format, Work with 3D models-territories, Import of 3D models from SketchUp and Autodesk 3dsMax